· Hasan Alp Güngör
How to set up a custom CS2 broadcast HUD: a step-by-step GSI guide
Everything you need to run a Major-style broadcast HUD in Counter-Strike 2: the GSI cfg file, the Python server, the OBS setup and fixes for the most common problems.
- CS2
- HUD
- OBS
- Game State Integration
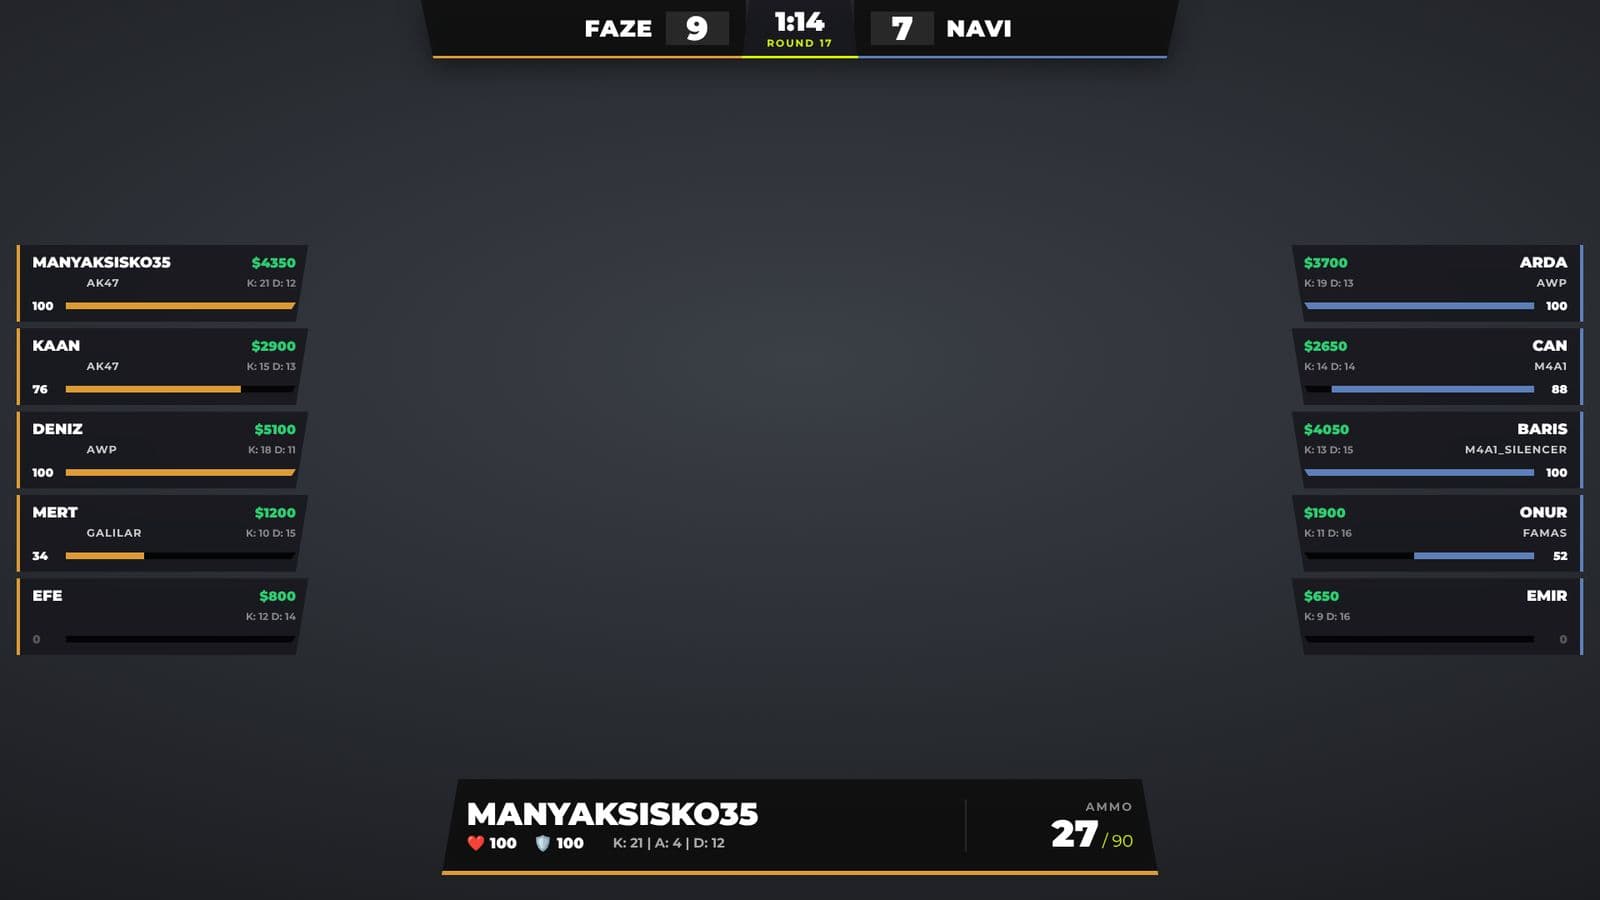
The custom overlays you see on tournament streams (team panels, the killfeed, the bomb timer) do not come from the game itself. A separate overlay reads the live match data the game sends out, and the streaming software puts it on top of the game. In this guide I set up my own open source CS2 Major HUD step by step. The same idea works for other GSI-based HUDs too.
What you need
- Counter-Strike 2 (Steam)
- Python 3 (from python.org)
- OBS Studio, or any streaming software that can add a browser source
- The HUD files: github.com/manyaksisko35/CounterStrike2MajorHUD
1. Add the GSI cfg file to the game
CS2's Game State Integration (GSI) sends the state of the match as JSON to an address you choose. To turn it on, put a file whose name starts with gamestate_integration_ and ends with .cfg into the game's cfg folder. Copy gamestate_integration_manyak.cfg from the project into this folder:
pathSteam\steamapps\common\Counter-Strike Global Offensive\game\csgo\cfgThe easy way to find the folder: in Steam, right-click CS2, choose Manage → Browse local files, then open game → csgo → cfg. This is what the file contains; the game sends data to 127.0.0.1:3000 every 0.1 seconds:
cfg"Manyaksisko35 GSI v1"
{
 "uri" "http://127.0.0.1:3000"
 "timeout" "5.0"
 "buffer"  "0.1"
 "throttle" "0.1"
 "heartbeat" "30.0"
 "data"
 {
   "provider"            "1"
   "map"                 "1"
   "round"               "1"
   "player_id"           "1"
   "player_state"        "1"
   "player_weapons"      "1"
   "player_match_stats"  "1"
   "allplayers_id"       "1"
   "allplayers_state"    "1"
   "allplayers_weapons"  "1"
   "allplayers_match_stats" "1"
   "phase_countdowns"    "1"
   "allplayers_position" "1"
 }
}
The game reads cfg files when it starts, so if CS2 is open, restart it.
2. Start the Python server
A small Flask server receives the data the game sends. Open a terminal in the project folder, install the packages and start the server:
bashpip install -r requirements.txt
python main.py
To check that it works, open http://127.0.0.1:3000 in a browser; you should see "CS2 GSI Sunucusu Aktif" ("CS2 GSI server is running"). During a match, http://127.0.0.1:3000/canli_veri shows the cleaned-up data the HUD reads. That is the first place to look when something is wrong.
3. Add the HUD to OBS
- In OBS, click + in the Sources box and choose Browser.
- Tick "Local file" and pick index.html from the project.
- Set the width to 1920 and the height to 1080. The background is transparent, so nothing else is needed.
- Move the browser source above your game capture.
The HUD asks the server 10 times a second and only updates what changed, so it does not flicker on stream. Team names and logos are written in index.html; change them there for your own match.
Common problems
- The HUD shows no data and the timer stays at "--:--": check that the cfg file name starts with gamestate_integration_ and that it is in the right folder, then restart CS2. Make sure the server is running.
- The team panels are empty: the game only sends every player's data (allplayers) while you are spectating, not while you are playing yourself. That is why broadcast HUDs are used in spectator mode or with GOTV.
- "Address already in use": another program is using port 3000. Change the port in main.py, the uri line in the cfg and the address in index.html to the same new port.
- Weapon icons are missing: the icons load from the internet. Without a connection, or if the address changes, the HUD shows the weapon name as text and keeps working.
If you want to see how the HUD looks before setting it up, the project page has a live demo running a sample match. The code is open on GitHub, and I wrote about how I built it in a separate post.